")
")
")
")
")
")
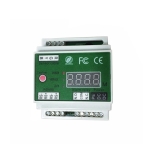
Product Name: Temperature & Humidity Management System – P-TH6
Product Description: The accurate control of temperature and humidity Controller is a very important condition for the high efficient productivity of agricultural greenhouse.
Product Name: Temperature & Humidity Management System – P-TH6
Product Description: The accurate control of temperature and humidity Controller is a very important condition for the high efficient productivity of agricultural greenhouse.
Product Description
Temperature And Humidity Controller for Agricultural Green house
Model: P-TH6
Introduction:
The accurate control of temperature and humidity is a very important condition for the high efficient productivity of agricultural greenhouse. The daily data of temperature and humidity in the greenhouse is influenced by the whether, warming, and ventilation, so the item is specially designed to control them accurately, not only to set the maximum and mini mun but also to control the outputting equipment such as: fan, heater, dehumidifier, humidifier when they’re beyond the pre-set data to keep the crops in their required environment. What’s more, P-TH6 can be connected to a host to make it possible for remote control so that it can improve efficiency and reduce the human resources.
Function Introduction
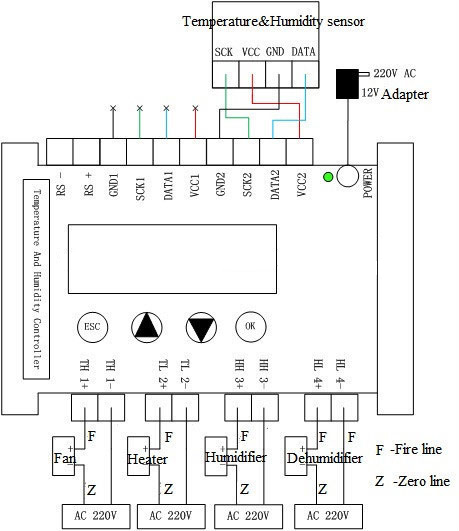
1.Item outline
2.Interface Definition
| Interface | Connected to |
| RS- | RS485 – |
| RS+ | RS485 + |
| GND1 | Non connection here/Pending |
| NC1 | Non connection here/Pending |
| DATA1 | Non connection here/Pending |
| VCC1 | Non connection here/Pending |
| GND2 | GND |
| SCK2 | SCK |
| DATA2 | DATA |
| VCC2 | VCC |
| POWER | AC 12V |
| TH1+ | High temperature outputting NO |
| TH1- | High temperature outputting NM |
| TL2+ | Low temperature outputting NO |
| TL2- | Low temperature outputting NM |
| HH3+ | High humidity outputting NO |
| HH3- | High humidity outputting NM |
| HL4+ | Low humidity outputting NO |
| HL4- | Low humidity outputting NM |
3.Function Instruction
The item use high sensitivity temperature and humidity sensor to make sure the accuracy.
It supports 4 out puttings, which can be separately connected to fan, heater, dehumidifier, humidifier etc.
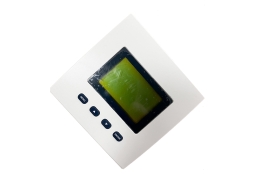
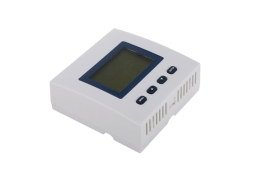
LCD panel makes it easier to check the data.
There are 4 setting buttons: ——Save & Exit, ——Up, ——Down, ——Confirmation. You can adjust the temperature and humidity by these 4 buttons according to the demanding growth environment of the crops.
To use MODBUS Communication Protocol and RS485 Communication mode to make data remote transmission. Also can be connected to a host to make integrated control.
There’s matched application software to make sure remote control to improve the efficiency and reduce human resources
4.Operational Instruction
Pic 3 LCD screen
9. When need to set the highest and lowest value of the temperature and humidity, please press “UP” ——or “Down” after you press “” and “ ” at the same time ——to move to setting page, as Pic4 shows:
Pic 4 first setting page
10. Then press “UP”—— or “Down”——to set it. If need to set the maximum of the temperature, please choose to the maximum setting page, as the following pic 5 shows:
Pic 5 the first setting page of maximum temperature setting
11. Press button”ok”——,then it moves to the second setting page of Maximum temperature setting as following pic 6 shows: the cursor is flashing
Pic 6 the second setting page of maximum temperature setting
12. Press button”OK”, the cursor will move towards right to set the value . When the cursor flashing under a number then you can set it. For example, if you want to set the max temperature as 50.0 ℃, first move the cursor under ten’s digit, then press button“UP”or “Down” until it shows “5”; next press button“OK”move the cursor under the digit, then press the button“UP”or“Down”until it shows 0, and according to the same way to set the decimal into 0, as following picture shows:
Next press button——to save and exit.
14. Each setting only can set one function, if you need to set next function just repeat the procedure from 9 to 13.
Attention
1, When connecting the sensor, please follow pic2 make sure it’s all right..
2, When connection outputting controllers, please follow pic 2, the fire wire and zero line should be all right or it will be dangerous.
3, The total loads of outputting should be within 1500W, or the controller will be burned up.
4, Please make sure RS485 in right interface or it won’t work normally.
5, Please make sure that all the input, output and communication interfaces are in right connection, then connect the 12V Adapter to AC 220V in case of burning the Controller and cause the danger..
6, After finishing all the procedures, finally open the AC 220V switch, or it’ll be dangerous.
7,Please follow the operation instruction to set the temperature and humidity, or therewill
be setting errors.

Focus on Environmental Monitoring & Water Leak Detection Solution.
 Water Sensing Rope for Efficient Leak Monitoring Systems